If a gardener has a desire to propagate grapes on his own plot, then he can use for this in two different ways. The first and easiest way is to buy seedlings in a special nursery. The second method, although labor-intensive, but more effective is to grow grape cuttings at home in winter. The second method has several positive aspects that distinguish it favorably, namely, the gardener will be able to get grape seedlings of the desired variety, while such planting material is much more stable when compared with that acquired in the nursery. To grow high-quality cuttings on your own, you just need to put in a little effort.
Content
Growing grape cuttings
Before planting the cuttings in a permanent place, you must first prepare them. Most gardeners do not have the necessary experience in this matter, because rarely has anyone done this before. The process of preparing grape cuttings is divided into several stages, each of which is of great importance:
- slicing;
- storage;
- preparation for disembarkation;
- germination.
In order to succeed in this business, you need to know all the basic rules for growing grape cuttings, as well as tricks and secrets.
Stage 1: Cutting cuttings
In autumn, all weakened or damaged branches die off, therefore it is at this time of the year that it is recommended to harvest grape cuttings (shanks). When cutting them, you must adhere to several basic rules:
- It is recommended to start cutting the shanks only when all the foliage has fallen from the bush.
- Try to select those branches that produce large clusters. The fact is that it is from such branches that the best planting material is obtained.
- Choose a vine that does not have curved shapes. It is best if it is as flat as possible.
- It should be remembered that the quality of the planting material is directly related to the length of the cutting.
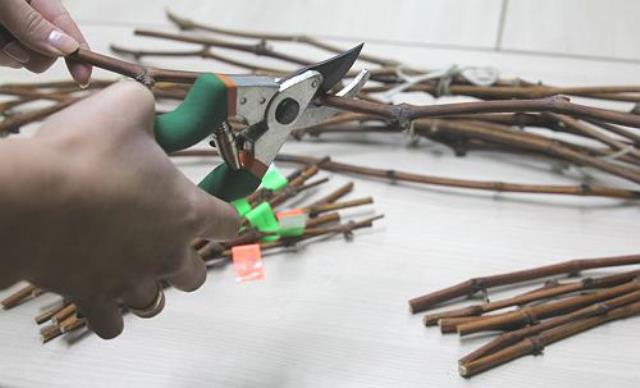
Remember that cutting the shanks at sub-zero temperatures is by no means possible. In this regard, if there are already frosts outside the window, then cuttings can only be made next year. To cut the shanks, you need a pruner. Prepare a solution of copper sulfate and immerse the cuttings in it immediately after cutting them.
Stage 2: Storage
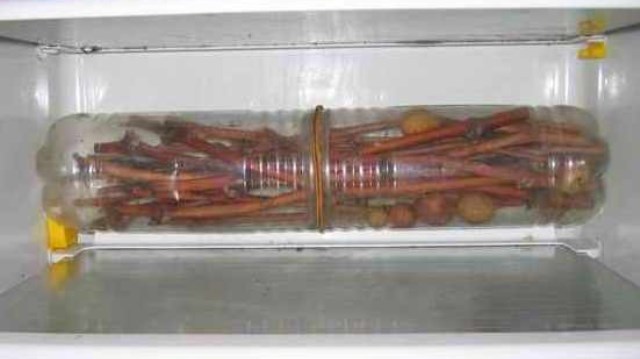
In order for the shanks to survive until spring, it is necessary to create the most favorable conditions for them.First of all, you need to divide the cuttings by grade. Then the cuttings of the same variety are tied together and placed in a separate polyethylene bag, which is then wrapped very tightly. It should be noted that you will have to save the grape shanks until spring. The fact is that it is at the beginning of the spring period that they are planted in open ground. There are several places where you can store grape cuttings quite successfully:
- Refrigerator shelf. This storage method is effective only when there are relatively few shanks.
- Basement. This storage method is ideal for those gardeners who grow grape seedlings not only for themselves, but also for sale.
- Country cottage area. There are also those gardeners who have learned to preserve material for planting until spring, simply by burying it in the ground. It should be remembered that the cuttings must be buried to a depth of at least half a meter.
In the process of storing shanks in the winter, various problems can arise, in this regard, it is necessary to systematically inspect them. In the event that you notice that the buds on the stem began to swell, this means that there is a high temperature in the place of their storage. If this is a refrigerator, then you just need to lower the temperature, otherwise move the cutting to a place where it is colder.
Stage 3: Preparing for landing
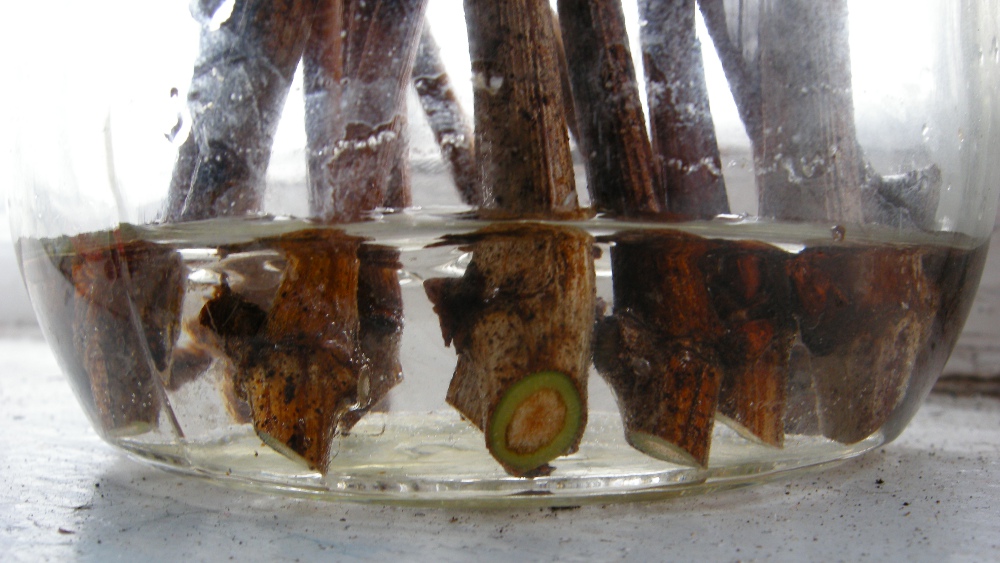
In the case when the grape shanks are well preserved, they can be quickly and easily prepared for planting in open soil. First of all, you will need to inspect each grape cuttings, while you need to remove those of them that are unsuitable for growing. To understand whether the shank is suitable for planting or not, you can make a transverse cut on it. Examine the incision site. In the event that it remains completely dry, then such a cutting can be thrown out, the fact is that it is completely dry and will not be able to give either roots or buds. In a good growing shank, moisture should come out of the cut. You also need to carefully examine the color of the cut. In the case when the stalk spent the whole winter in favorable conditions for it, then its cut should be painted in a rich green color. Examine the cut carefully, as there should not be a variety of inclusions.
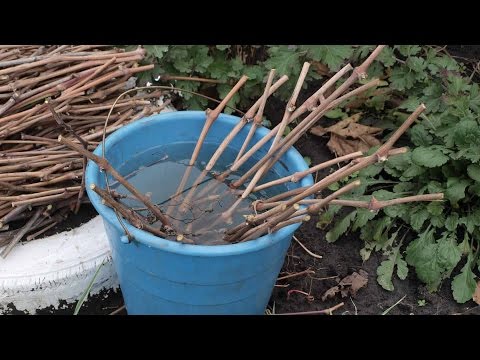
After you have thoroughly examined the grape shanks and graded them, you can begin the procedure that will wake them up. Take a container of the required volume and fill it with lukewarm water. Then dip the grape cuttings into it. They will have to stay in the water for at least two days. After that, prepare a solution of a product that stimulates the growth of roots (you can buy it at a specialty store). When you take the shanks out of the water, they must be immediately immersed in this solution.
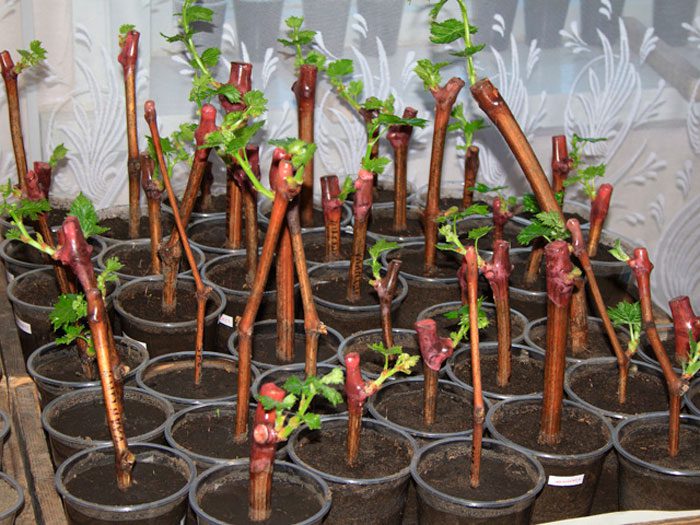
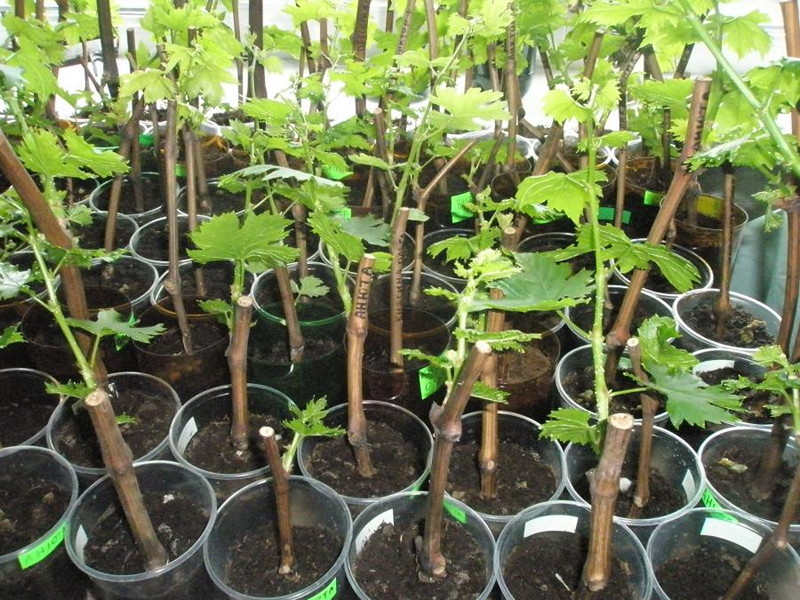
Stage 4: Germination
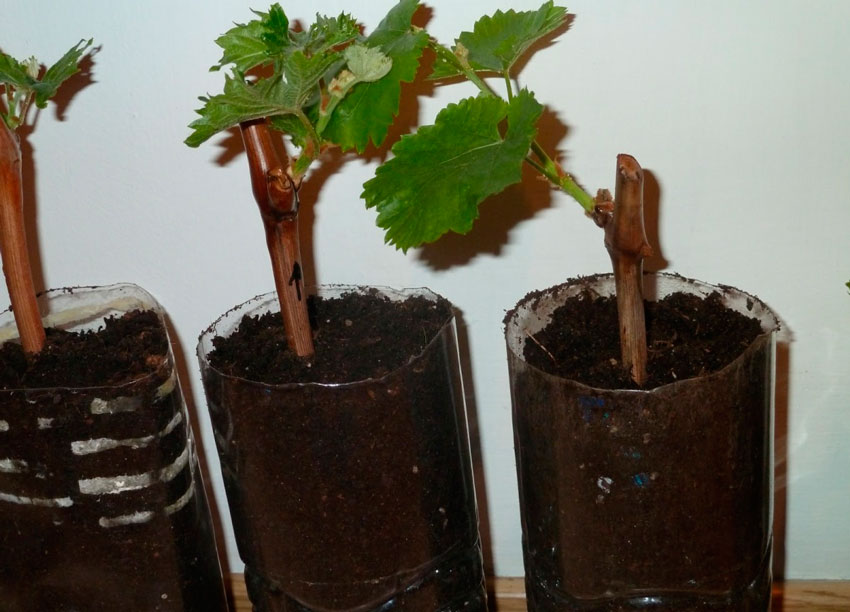
This stage is the very last and at the same time it is very important. In order to germinate cuttings, gardeners use two methods, so you can choose the one that suits best:
- With a glass. You need to prepare a large plastic glass. On the bottom, you need to make 3 large holes, it is most convenient to do this with an awl. Pour soil mixed with compost at the bottom. Then you need to take a glass of plastic with a smaller volume and cut the bottom out of it. After that, this glass must be inserted into the first glass with earth. A smaller glass should be filled with sand and well watered. The chubuk must be stuck in the sand. In order to keep warm there, it is recommended to use polyethylene film.
- With a plastic bottle. You will need the most common plastic bottle. A not very high drainage layer must be laid on its bottom. A layer of compost, nutrient soil or peat must be poured over it. A shank immersed in the soil should have the tip at the same level as the bottle. The bottle is covered with a plastic glass on top.After the formation of the first young shoots, the shelter is removed.
Both of these methods are quite effective. However, in order to successfully grow grape shanks, they need to provide systematic watering, as well as good lighting. It is possible to transplant cuttings into open ground only after they have formed roots and the first foliage has grown.